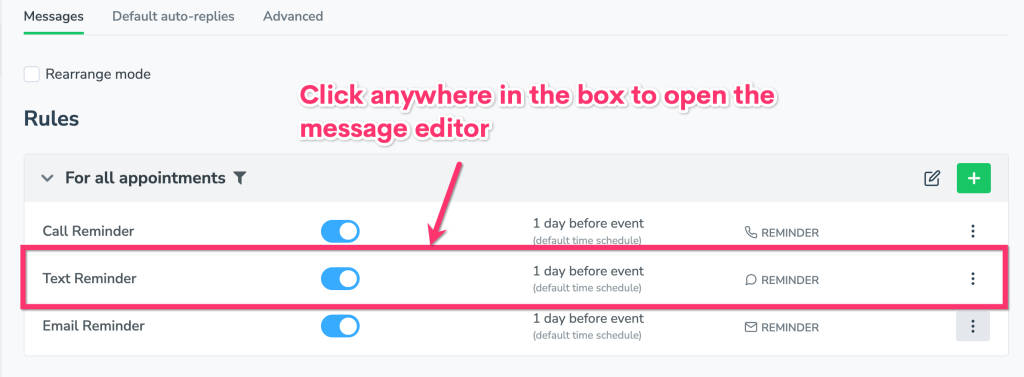
To edit your messages, click on the “Appointment Auto Messages” tab within the “Messaging” tab in the left-hand navigation bar.
To edit any portion of a message (timing, content, etc.), just click on the message, in this case “SMS Reminder,” which will open the editor for that message.

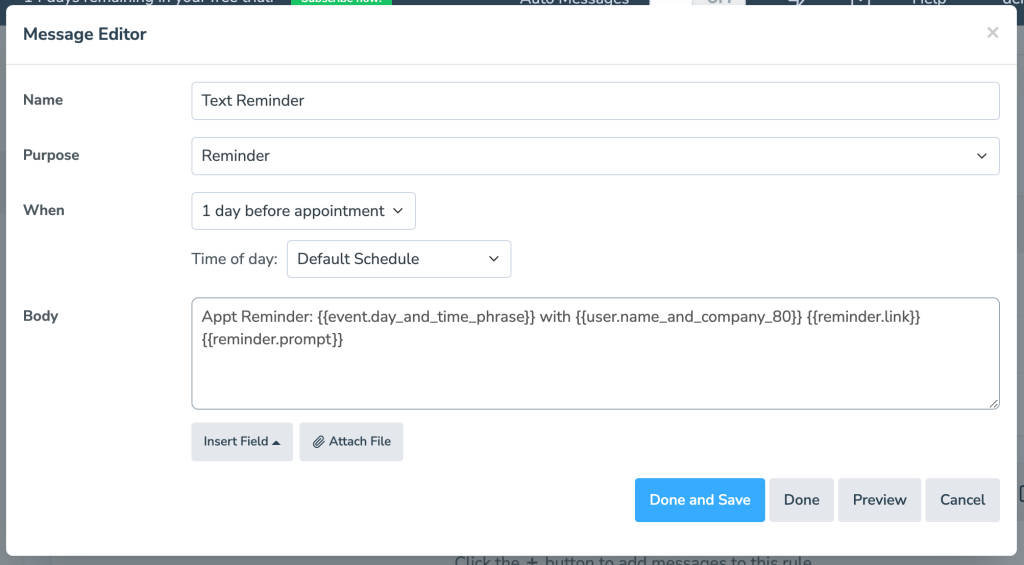
By default, it will look like this:

Name
You can change the name of each message to reflect its content (e.g., “New Client SMS”) for easier reference.
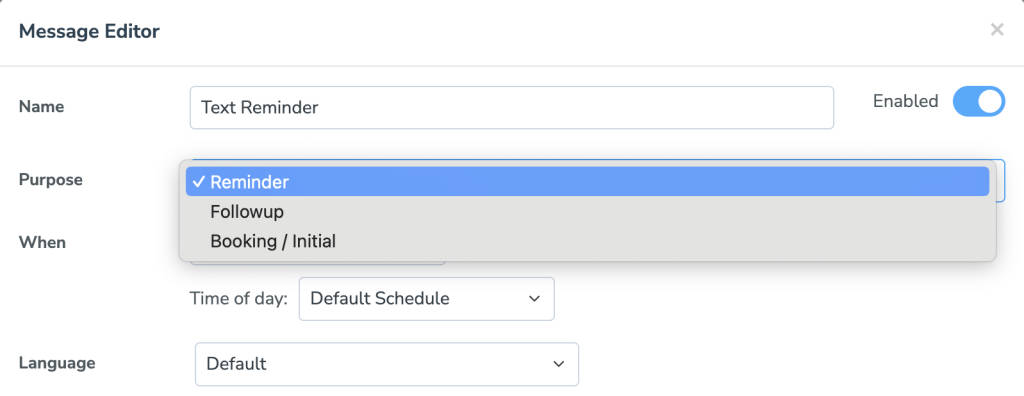
Purpose
Each message in the Appointment Auto Messages tab can be one of three types: Reminder, Follow-up, or Booking.

Reminder: The default setting. Will be the messages you send leading up to an appointment
Followup: Messages set to go out after an appointment with additional information
Booking: Messages sent due to the creation of an appointment
When
This specifies when a message will be sent. For more information, see Message Timing Options.
Body
This is where the actual content of your message resides. You can use either plain text, Fields to insert appointment-specific information into individual outgoing messages, or a combination of both.
Read up on Message Templates to learn how fields, filters, and conditional blocks work within the message templates to dynamically generate a different message for each appointment automatically.
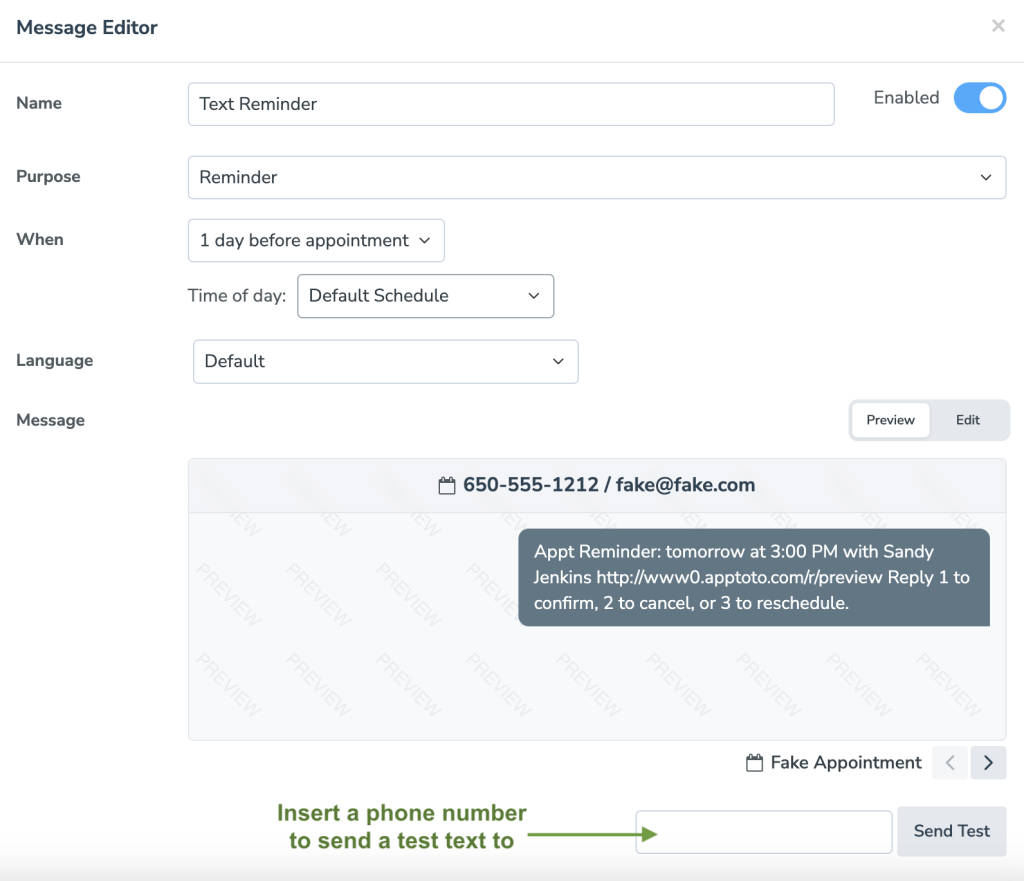
Clicking “Preview” will bring up a fake appointment for that message, along with upcoming appointments on your calendars, and will show you what the outgoing message will look like for that individual appointment.

When the message content looks the way you want it to, click the “Back” button to return to the main Message Editor page.
Once you’ve set the content of your message, you’ll need to set the Message Timing to determine when your message is sent.
Apptoto now supports attachments to both incoming and outgoing SMS and emails. On the messages where this feature is available, there will be a clickable Attach File button. For more information on that, click here.